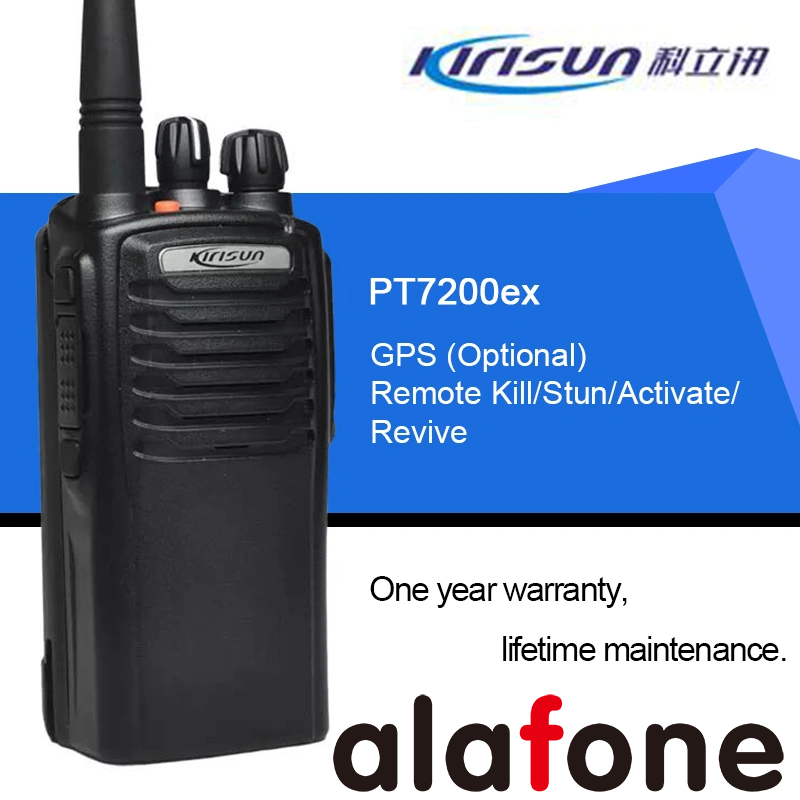
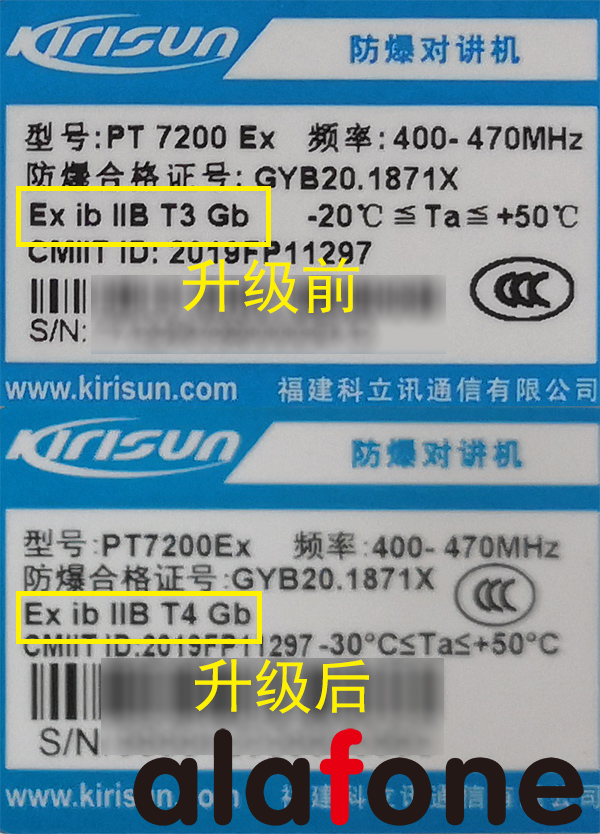
The Kirisun PT7200EX explosion-proof walkie talkie was originally a simulated explosion-proof walkie talkie, but before upgrading, its explosion-proof certification was Ex ib IIB T3 Gb.
After the upgrade, the PT7200EX is a digital explosion-proof intercom with upgraded performance and explosion-proof certification of Ex ib IIB T4 Gb.
The standard battery of the original Kirisun PT7200EX is a nickel hydrogen battery; The newly upgraded PT7200EX comes standard with a lithium battery.
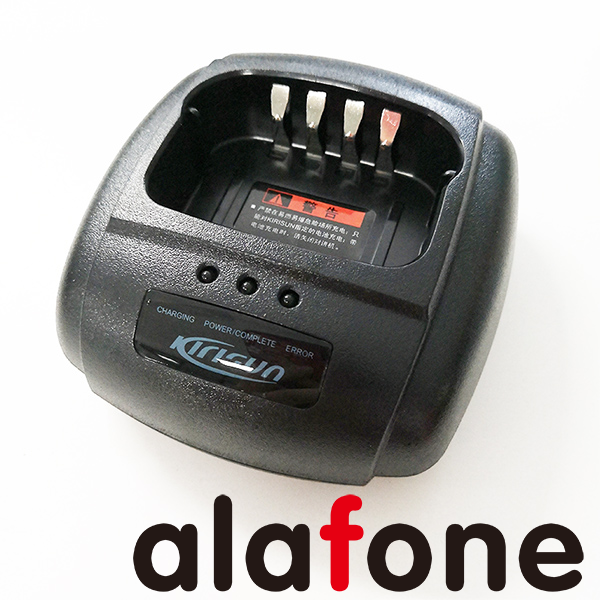
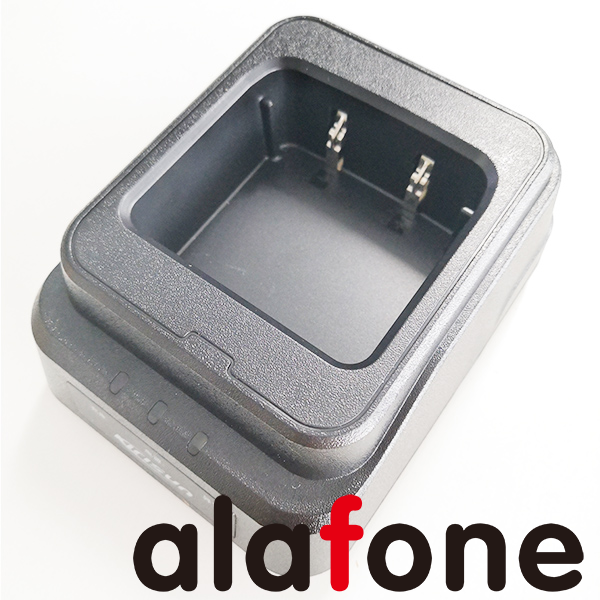
Although the Kirisun PT7200EX walkie talkie and nickel hydrogen lithium battery can be used, the charger is different, mainly in the charging dock. So when choosing accessories, be careful not to make the wrong choice.
The old model of the Kolixun PT7200EX walkie talkie charging dock is KBC-70Q-Ex.
The newly upgraded Kirisun PT7200EX walkie talkie charging dock model is KBC-980Q-Ex.
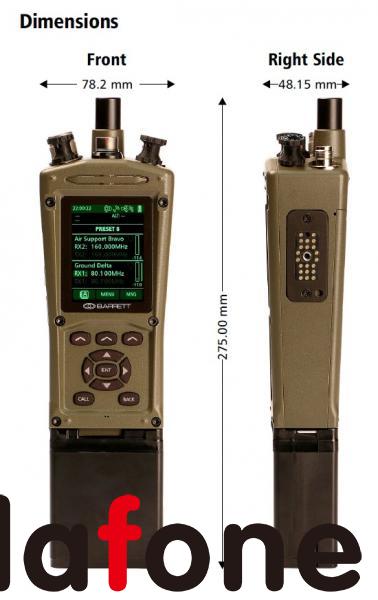
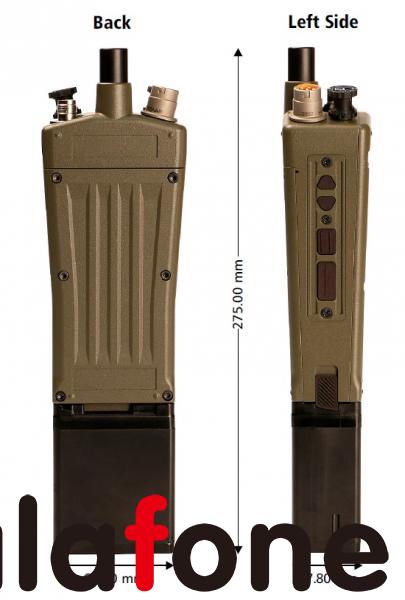
Barrett PRC-4080, an SDR tactical radio station that has undergone practical testing in over 150 countries worldwide
In the constantly evolving fields of military and security applications, communication is the key to ensuring success. Introduce Barrett PRC-4080, an advanced VHF Software Defined Radio (SDR) tactical transceiver designed to meet the needs of modern warfare and security operations.
Compact and lightweight, ready to attack anytime: The PRC-4080 takes pride in its compact and lightweight design, making it an ideal companion in dynamic and fast-paced tactical environments. Whether in motion or stationed at critical locations, its portability ensures seamless integration in various operational scenarios.
The versatility of communication: covering the VHF spectrum of 30 to 175 MHz, the PRC-4080 supports multiple modulation methods, including FM narrowband, FM broadband, DSB AM, and digital modulation. Through channel spacing options of 5KHz, 6.25KHz, 12.5KHz, and 25KHz, this transceiver provides flexibility to meet different communication needs.
Advanced signal processing and security features: Equipped with advanced digital signal processing (DSP), the PRC-4080 ensures clear and reliable communication under various complex conditions. Security is crucial, as this transceiver provides encryption levels of AES 256 and DES 56, secure message transmission, and frequency hopping, enhancing operational confidentiality.
Adaptability to various task configurations: PRC-4080 offers multiple configurations to adapt to different task profiles. The transceiver can be adjusted according to the specific needs of the task, from a 5-watt handheld suitable for mobile operations to a 50 watt base station for establishing a stable communication center.
Optional configuration:
5-watt handheld
25 watt portable
50 watt car mounted
50 watt base station
50 watt broadcasting system
Seamless integration with accessories: The inclusion of external interfaces such as smart handheld interface, GPS antenna interface, and side hot shoe interface enables the PRC-4080 to seamlessly integrate with various accessories, enhancing its functionality and adaptability on site.
Durable structure and endurance: The PRC-4080 has been designed to withstand the harshest conditions and meets MIL-STD 810H standards for impact and vibration resistance. Its IP67 rating ensures complete immersion up to 1 meter, making it resilient in harsh weather and environmental conditions.
Global reliability and interoperability: As part of the Barrett transceiver series, the PRC-4080 has been field validated in over 150 countries and on every continent worldwide. It not only meets but also exceeds the strict electromagnetic compatibility standards of MIL-STD 461, ensuring global reliability and interoperability.
Remote control and network support: With remote control capability through IP Ethernet or USB connection, PRC-4080 achieves seamless operation and programming. Its compatibility with IP networks promotes remote control, programming, and IP audio support, enhancing usability in various operational scenarios.
In summary, the Barrett PRC-4080 VHF SDR tactical transceiver is a model of advanced technology, adaptability, and reliability. Whether in fierce battles or strategic security operations, PRC-4080 enhances communication to ensure accurate and secure communication of critical information. To enhance your tactical communication capabilities, choose Barrett PRC-4080- the true on-site power multiplier.
Quansheng UV-K5 and Quansheng K6 are both UV portable walkie talkies with the function of receiving aviation frequency signals. Considering the stability and clarity of listening to aviation frequency signals, it is necessary to compare the performance of the two walkie talkies from the following factors:
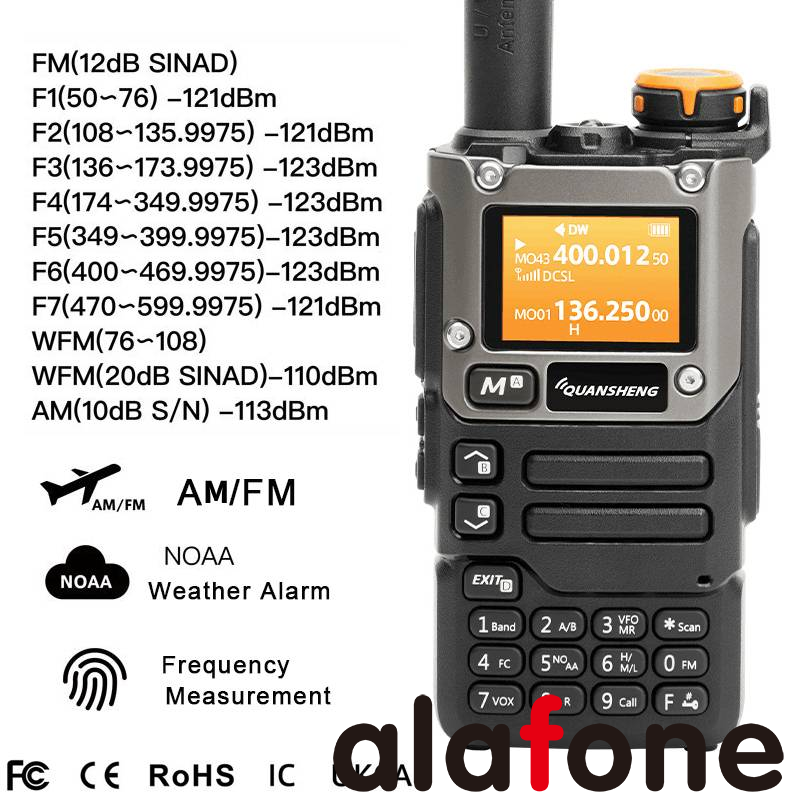
1 Receiving frequency range: Both walkie talkies can receive signals in the aviation band (118MHz -136MHz), but the Quansheng K6 also supports a longer receiving range (400MHz -470MHz), so if you need to receive other close range communication frequencies, the Quansheng K6 may be more suitable.
2. Receiving sensitivity: Receiving sensitivity represents the sensitivity of the walkie talkie to the weak signal received, usually measured in dBm units. In terms of aviation frequency band signal reception, the reception sensitivity of Quansheng UV-K5 is displayed as less than or equal to -107dBm, and the reception sensitivity of Quansheng K6 is displayed as less than or equal to -122dBm. It can be seen that the Quansheng K6 performs better in low intensity signal scenarios.
3. Hardware quality: In terms of product hardware quality, Quansheng K6 adopts better packaging, circuit boards, and screens, resulting in a higher overall texture.
Overall, both Quansheng UV-K5 and Quansheng K6 have certain signal reception capabilities in receiving aviation frequency signals, and both discrete circuits are well-designed. If your requirements are limited to aviation frequency reception, then Quansheng K6 is a better choice based on the reception range and sensitivity indicators. If you need to receive communication signals from other frequencies or require better hardware quality, you may need to choose another walkie talkie or make more specific product comparisons.
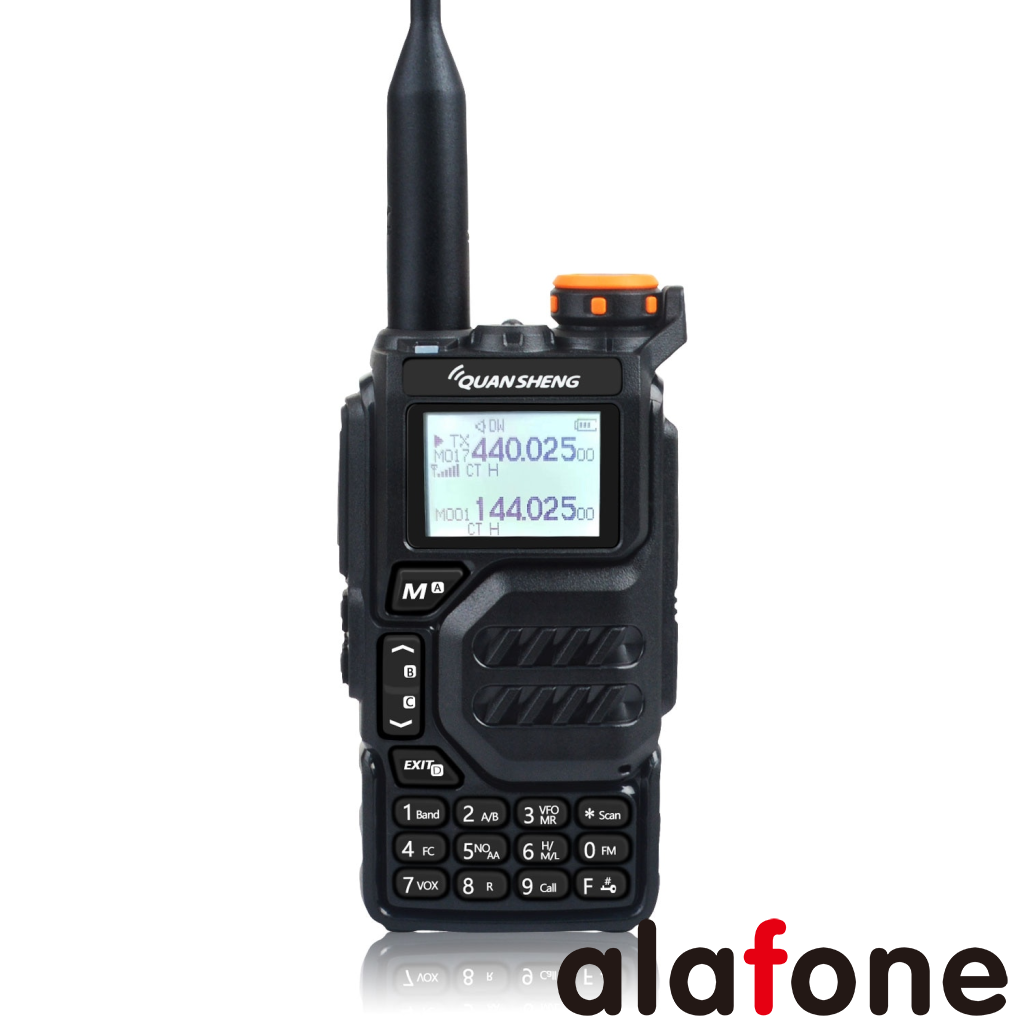
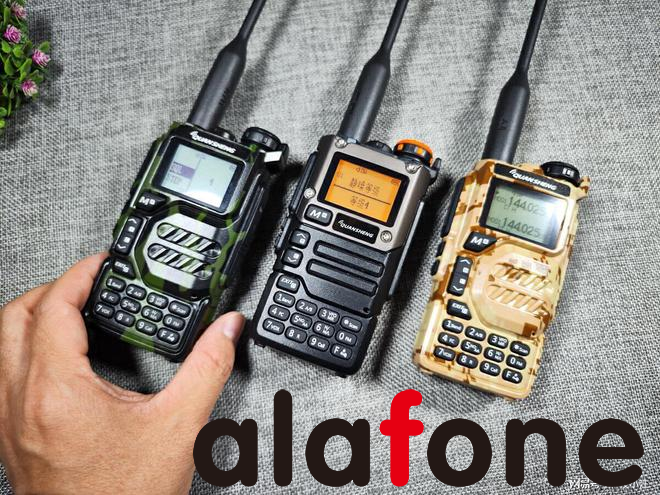
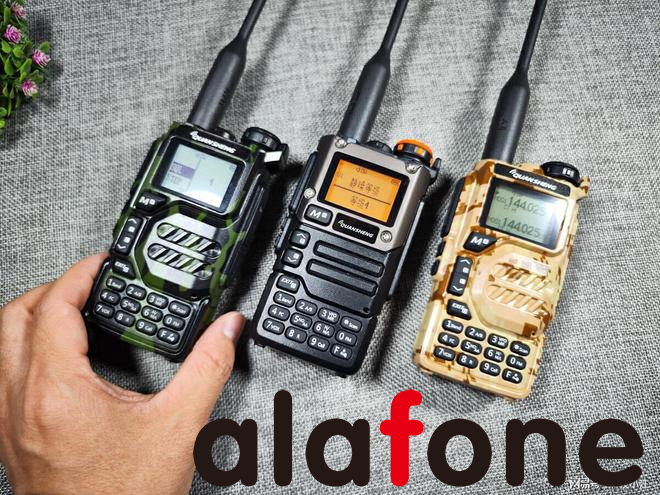
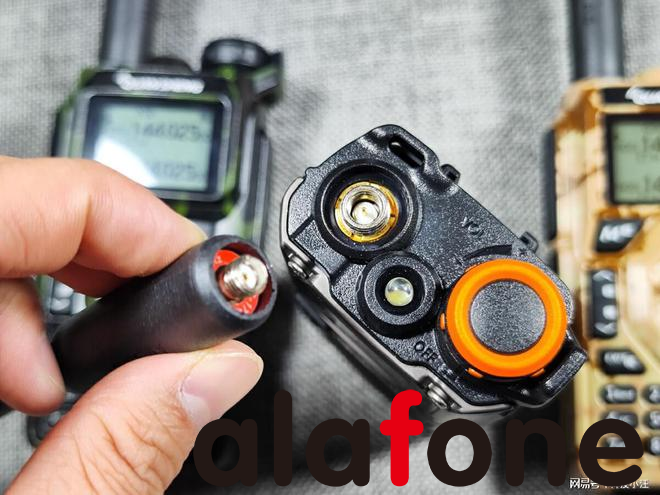
The Quansheng UV-K5 walkie talkie has a very high popularity in terms of walkie talkies. Not long ago, the upgraded version of K5, K6, also came into the sight of amateur radio enthusiasts. So, what are the upgrades in this “mid-term facelift” K6? I believe this is the area that many friends are paying attention to, after all, the K5 is already a highly cost-effective UV dual Band handheld radio with comprehensive functions. Is it necessary to spend more money on these upgrades ?
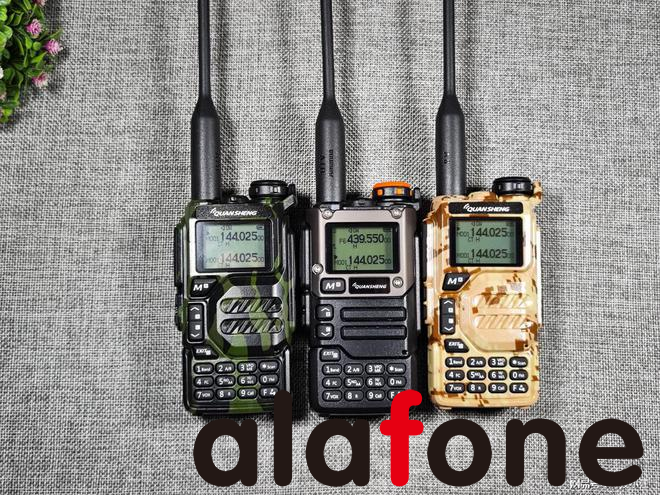
This Quansheng UV-K6 walkie talkie officially offers three major upgrade points, namely: sound quality upgrade, orange backlight, and metal front cover.
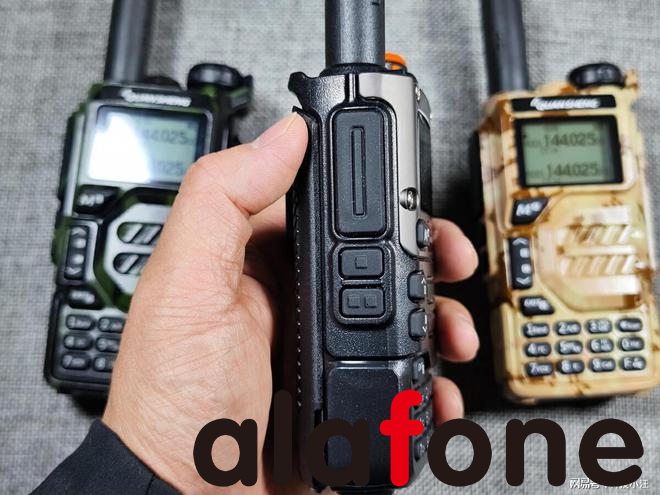
Both K5 and K6 support C-port charging, and the Type-C interface on the side can directly connect to the charger to charge the walkie talkie battery. I think this design is really very convenient and practical. However, when flashing, you still need to use the K port on top. When flashing, you need to long press the PTT button to turn on the device, keep the flashlight on, and the screen will not display, indicating that the flashing mode is enabled. Then, open the flashing software, select the COM port corresponding to the write frequency cable, and select the firmware for the flashing function. The specific flashing process will not be repeated. Friendly reminder: there is a risk of flashing and there is a possibility of bricking.
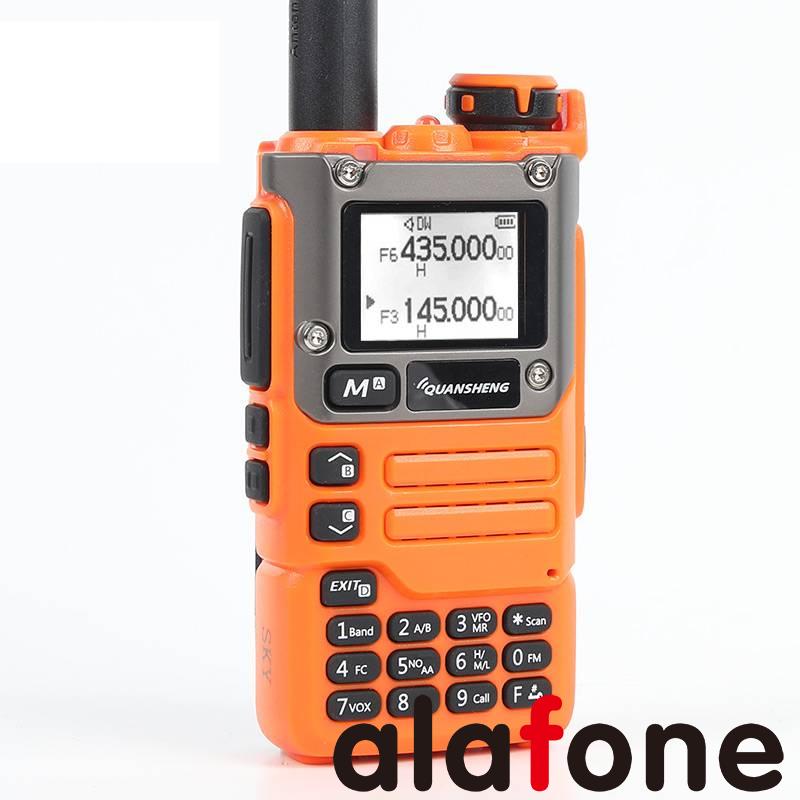
Another upgrade of Quansheng UV-K6 is the orange backlight, which complements the orange color of the top volume knob. I think it’s a finishing touch. However, some people also like the white backlight, which varies from person to person. In addition, keyboards that were not officially mentioned have also been upgraded. Although the key positions of K5 and K6 have not changed, the keys of K6 are more regular, unlike K5 which has some irregular keys. Some users have reported that after upgrading the keys of K6, some key problems that existed on K5 have been optimized. I have not conducted a lengthy test on K5 and have not found any issues with its buttons. However, personally, I still quite like K6, which has a relatively regular button style.
The left operating area of K6, like K5, has not changed at all. The button feel is average, but the official mentioned an improvement in the sound quality of K6 (upgraded speaker). However, the recently produced K5 also uses the same speaker as K6, so the sound quality of the current K5 and K6 is not much different, and the effect is indeed a certain improvement compared to the early K5.
In terms of antenna interface, like K5, K6 uses SMA male head and SMA female head. Of course, upgrading the antenna is one of the most convenient ways to improve communication performance.
Finally, as a cost-effective handheld walkie talkie, both K5 and K6 are commendable in terms of functionality. U-band 400-470MHz transmission and reception, 470-600MHz reception; V-band 136-174MHz transmission and reception, 174-400MHz reception; 50-108MHz reception and aviation frequency reception, as well as very practical one click frequency matching function, can be said to be a comprehensive UV dual band walkie talkie. Of course, except for the lack of Bluetooth function, it is a small regret.
The main difference between Quansheng K5 and K6 lies in their power and applicable scenarios
Firstly, the Quansheng K5 is a handheld wireless microphone with low power, commonly used in recording studios or live music performances that require precise sound control. It has a lighter weight and good handheld comfort, making it suitable for long-term use. K5 adopts high-quality materials and sophisticated manufacturing processes, ensuring its stability and reliability.
In contrast, the Quansheng K6 has a higher power output and is suitable for a wider range of occasions, such as live performances, radio program production, and movie dubbing. The powerful power of K6 can provide clearer, richer, and more powerful sound, making it perform well in situations that require larger sound output. In addition, K6 also has some additional features, such as adjustable directionality, optimized noise suppression, and gain control, which enable it to meet the needs of users in various sound processing needs.
Overall, Quansheng K5 and K6 each have their own advantages and suitable occasions. K5 is suitable for situations that require fine control of sound, while k6 is suitable for situations that require larger sound output and provides more sound processing functions. When choosing, users need to decide which product to use based on their own needs.
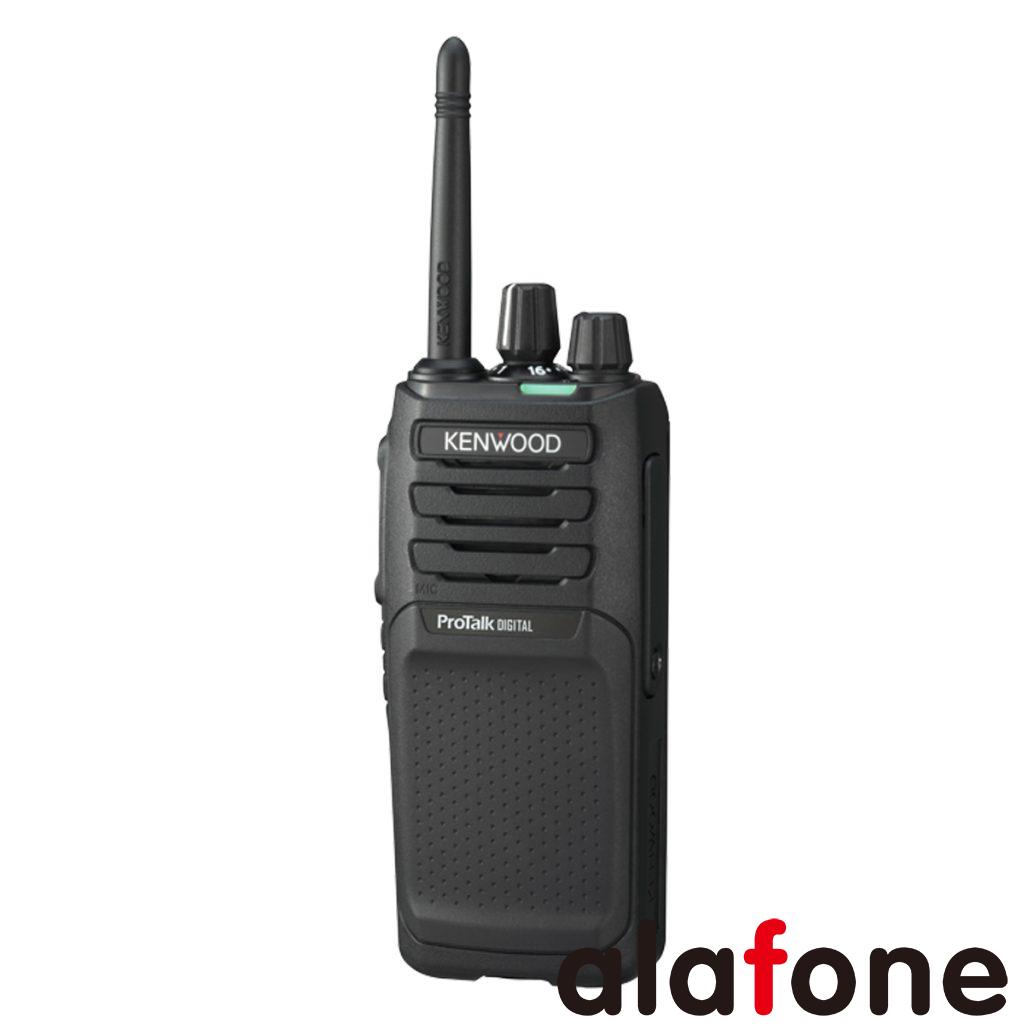
The Kenwood TK-3701D is a digital/analog two-way radio that supports both digital PMR446 and analog PMR446 modes. To mix digital and analog users with second PTT (Push-to-Talk) on PMR446-dPMR446 frequencies, you would typically configure your radios accordingly. Here are general steps for doing this:
1. Read the User Manual:
Refer to the user manual provided by Kenwood for the TK-3701D. It should contain specific instructions for configuring the radio for both digital and analog modes and how to use a second PTT for switching between them.
2. Switching between Digital and Analog:
The TK-3701D likely has a menu option or a button that allows you to switch between digital and analog modes. Check the user manual for details on how to toggle between these modes.
3. Programming Channels:
Program your desired channels with the appropriate digital or analog settings. Assign different channels for digital and analog communication.
4. Assign Second PTT Function:
Check if the radio supports a second PTT function for toggling between digital and analog modes. This might be a dedicated button or a programmable function. Program this button or function to switch between the two modes.
5. Set Digital and Analog Squelch (CTCSS/DCS):
If using analog mode, set the CTCSS (Continuous Tone-Coded Squelch System) or DCS (Digital Coded Squelch) codes as needed. For digital mode, ensure the radios are using the same digital encoding.
6. Testing:
After programming the channels and configuring the second PTT function, conduct tests to ensure that users can switch between digital and analog modes using the designated button or function.
7. Ensure Compatibility:
Confirm that all radios in your communication group are compatible with both digital and analog modes. Mixing radios that only support one mode may result in communication issues.
8. Backup and Restore Settings:
If your radios allow it, consider saving a backup of your programming settings. This ensures that you can quickly restore your configuration in case of accidental changes.
9. Group Communication:
Coordinate with your group of users to ensure everyone is aware of the channels and settings for both digital and analog modes.
10. Battery Management:
Consider the impact on battery life when using digital mode. Digital transmissions often require more power than analog, so plan accordingly.
11. Legal Compliance:
Ensure that you operate your radios within the legal requirements for PMR446 or dPMR446 frequencies in your region. Adhere to licensing and power regulations.
Note:
Always consult the user manual specific to your Kenwood TK-3701D model for accurate and detailed instructions. If you do not have the manual, you can usually find it on the manufacturer’s website or contact Kenwood customer support for assistance.
Remember that the specifics of programming and using these features can vary between different radio models, so following the instructions provided by Kenwood is essential for proper configuration.
UHF (Ultra High Frequency) and VHF (Very High Frequency) are two different frequency bands used in two-way radios, and they have distinct characteristics that make them suitable for different applications. Here are the key differences between UHF and VHF two-way radios:
UHF (Ultra High Frequency):
Frequency Range:
UHF radios operate in the frequency range of 400 MHz to 512 MHz (some models go up to 900 MHz). The higher frequencies allow for shorter wavelengths.
Propagation:
UHF signals have shorter wavelengths, which means they are better at penetrating obstacles like buildings, trees, and walls. This makes UHF radios more suitable for indoor use and urban environments.
Interference:
UHF signals are less prone to interference from other electronic devices. This makes UHF radios a good choice in areas with a lot of electronic equipment or in situations where there might be interference from other radio signals.
Range:
UHF radios typically have a shorter range compared to VHF radios when used in open spaces. However, they may perform better in environments with obstacles.
Common Applications:
UHF radios are commonly used in urban areas, indoor environments, construction sites, warehouses, and situations where obstacles may affect signal propagation.
VHF (Very High Frequency):
Frequency Range:
VHF radios operate in the frequency range of 136 MHz to 174 MHz. The lower frequencies result in longer wavelengths.
Propagation:
VHF signals have longer wavelengths, which allows them to travel longer distances in open spaces. However, they are more affected by obstacles, making them less suitable for indoor use.
Interference:
VHF signals may be more susceptible to interference from electronic devices, especially in urban environments. However, in open spaces, VHF radios can provide clear communication.
Range:
VHF radios often have a longer range in open areas or rural settings compared to UHF radios. This makes them suitable for outdoor activities like hiking, camping, and agriculture.
Common Applications:
VHF radios are commonly used in outdoor and rural settings, such as agriculture, forestry, search and rescue, and marine communication.
Considerations:
Obstacles vs. Open Spaces:
Choose UHF for better performance in urban and indoor environments with obstacles.
Choose VHF for better range in open spaces and outdoor settings.
Interference:
UHF is less susceptible to interference from electronic devices.
VHF may experience more interference in urban areas but can offer clear communication in open spaces.
Licensing:
Licensing requirements for UHF and VHF radios can vary by region. Check with local regulatory authorities for licensing information.
In summary, the choice between UHF and VHF two-way radios depends on the specific requirements of the application and the environmental conditions in which they will be used. Each frequency band has its advantages and limitations, so understanding these differences is crucial for selecting the most suitable option.
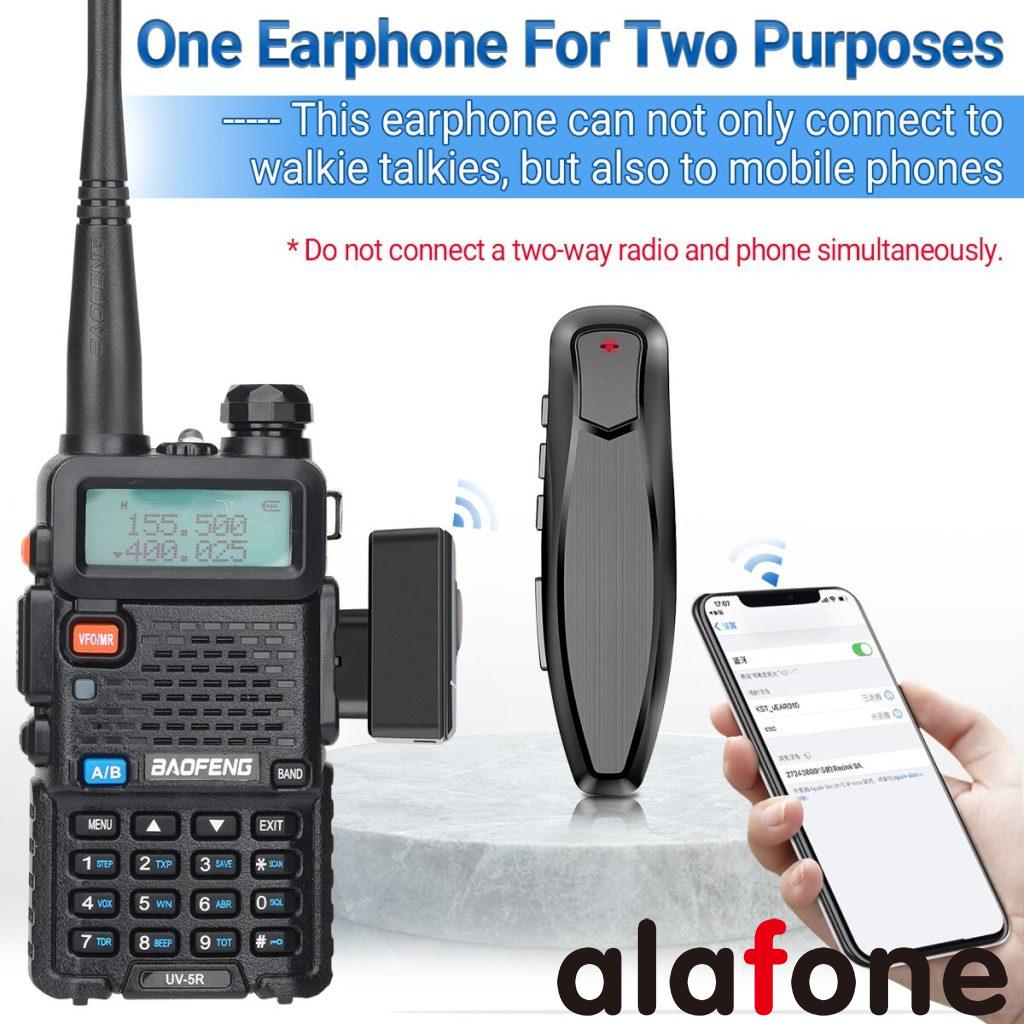
Connecting an earpiece to a two-way radio involves a few steps to ensure proper functionality and compatibility. Here’s a general guide on how to correctly connect an earpiece to a two-way radio:
Steps:
Check Compatibility:
Ensure that the earpiece you have is compatible with your specific two-way radio model. Radios may have different types of connectors, so make sure they match.
Power Off the Radio:
Turn off your two-way radio before connecting or disconnecting any accessories to prevent electrical issues.
Locate the Earpiece Jack:
Identify the audio jack on your two-way radio. This is typically located on the side of the radio and is labeled as the “audio” or “earpiece” jack.
Insert the Earpiece Connector:
Align the earpiece connector with the radio’s audio jack. Insert it firmly but gently to ensure a secure connection.
Secure the Connector:
Some earpieces have a locking mechanism to secure the connection. If your earpiece has a locking feature, ensure it is engaged to prevent accidental disconnection.
Adjust the Earpiece:
If your earpiece comes with an adjustable or flexible ear loop, mold it to fit comfortably around your ear. Ensure that the earpiece speaker is positioned correctly for clear audio.
Power On the Radio:
Turn on your two-way radio and perform a test transmission to check if the earpiece is functioning correctly. Listen for clear audio and adjust the volume as needed.
Testing the Microphone (Optional):
If your earpiece includes a microphone, perform a test transmission to ensure that the microphone is working properly. Some earpieces have a built-in push-to-talk (PTT) button on the microphone for convenience.
Adjust Audio Settings:
If your radio has adjustable audio settings, such as volume controls or audio profiles, adjust them to your preference for optimal listening.
Securing the Cable:
Secure the cable of the earpiece to your clothing or gear using clips or clothing clips provided with the earpiece. This helps prevent the cable from snagging or getting in the way.
Tips:
Clean Connections: Periodically check and clean the connectors to maintain a reliable connection.
Use Genuine Accessories: Whenever possible, use accessories recommended or provided by the manufacturer to ensure compatibility and reliability.
Follow Manufacturer Instructions: Refer to the user manual or instructions provided by the two-way radio and earpiece manufacturers for specific guidance.
By following these steps, you should be able to correctly connect an earpiece to your two-way radio for clear and effective communication.
Midland GMRS (General Mobile Radio Service) and Business Band radios are both types of two-way radios designed for communication purposes, but they serve different user groups and have distinct characteristics. Let’s explore the key differences between Midland GMRS and Business Band radios:
Frequency Range:
Midland GMRS: Operates within the GMRS frequency range, typically around 462 to 467 MHz. GMRS radios are commonly used for personal and family communication, outdoor activities, and in some cases, for business use.
Business Band: Business Band radios can operate on various frequency ranges, including VHF (Very High Frequency) or UHF (Ultra High Frequency). Common frequency bands for business use are around 150 MHz (VHF) or 450-470 MHz (UHF).
License Requirement:
Midland GMRS: Requires a GMRS license from the FCC (Federal Communications Commission) for legal operation. This license covers the entire family or group using the radios and is relatively easy to obtain.
Business Band: Also requires an FCC license, but the licensing process for business radios is typically more involved. Each radio must be licensed individually, and the process may include coordination with frequency coordinators to avoid interference with other businesses using similar frequencies.
Power Levels:
Midland GMRS: Limited to a maximum power output of 5 watts for handheld radios and 50 watts for mobile/base station radios.
Business Band: Can have higher power output options, often ranging from 1 to 5 watts for handheld radios and up to 50 watts or more for mobile/base station radios. This allows for a potentially longer communication range in certain situations.
Purpose and Use:
Midland GMRS: Primarily designed for personal and recreational use, such as hiking, camping, family outings, or neighborhood communication. They are also used in some small business scenarios.
Business Band: Specifically designed for commercial and business applications. Common uses include construction sites, manufacturing facilities, security operations, and other professional settings where reliable and efficient communication is crucial.
Features:
Midland GMRS: Often equipped with features suitable for casual users, such as weather channels, privacy codes, and simple user interfaces.
Business Band: May offer more advanced features tailored to professional use, such as encryption, programmable channels, multiple user groups, and compatibility with other business communication systems.
In summary, Midland GMRS radios are generally more accessible for personal and family use, while Business Band radios are designed for commercial and professional applications, offering more power, features, and requiring a more complex licensing process. The choice between the two depends on the specific needs and intended use of the radios.
Hytera PDC550 supports both DMR narrowband and broadband calls.
I have obtained two PDC550 PoC radios recently and would like to share with you my using experience.
I. Unpacking the box
Hytera PDC550 package in black is simple and compact. It includes a radio, an antenna, a charger, and a belt clip. The installation is also simple. The following figure shows the overall looking.
PDC550 is characterized by the matte texture and two-color injection molding body. The radio is solid and elegant, and provides great tactile hand feeling. When you hold the radio in one hand, the position of the PTT key is just right for your thumb, ensuring smooth operations.
PDC550 has unique design in details, which shows Hytera’s great ingenuity.
The volume function and the channel switching function are integrated into one button, leaving more space on the top for easier operation of the emergency button.
A colored ring is available at the bottom of the antenna. You may select any of the four colors to easily manage multiple groups.
Secure belt clip design. Different from the common radios that secure belt clips with screws, Hytera PDC550 adopts a smarter design. To install the belt clip, users need to first remove the battery, insert the belt clip into the battery inner side, and reinstall the battery. Compared with the conventional method, this design is more convenient and no tools required.
As a high-end, large-screen smart PoC radio, PDC550 is configured with a 5-inch HD industrial-grade touchscreen with a resolution of 1280×720. The multi-touch screen uses the third-generation Corning Gorilla Glass that is visible under strong light and supports operations with gloves and wet hands.
Side keys 1 and 2 and the emergency key are programmable keys. Pressing the keys in a short time or a long time can trigger different functions. The following functions can be set via the app in the radio:
Zone switching, emergency alarm, scrambling/encryption, power adjustment, mute/ringing adjustment, monitoring, network disconnection, scanning, camera, audio recording, screen capture, covert mode, etc. Compared with traditional radios that require professional programming software to set programmable keys, Hytera PDC550‘s programmable keys are much more convenient.
PDC550 is IP68 rated. When we soaked PDC550 in water, it still worked normally.
Hytera PDC550 comes with a standard 2400 mAh (optional 3500 mAh) battery, and the tested standby time is 45.5 hours (with 5% remaining power). When PoC communication software is enabled, to maintain the radio is always active for data receiving in real time, the PoC radio must keep alive link with the server. Under such condition, the tested standby time is 23 hours, meeting users’ long working hour requirements in outdoor areas.
II. Professional Narrowband Radio Capabilities
Hytera PDC550 supports 136-174MHz, 350-400MHz and 400-470MHz frequency. And it enables digital and analog Direct Mode Operation(DMO) and Repeater Mode Operation(RMO) functions. The tested audio is clear and authentic. When two radios are getting close, no squealing sound is made. PDC550 uses dual-microphone noise reduction design to realize powerful voice recognition. It can accurately identify the user’s audio, and suppress noise in a noisy environment.
Programming can be performed through settings on PDC550, which is much more convenient than that of traditional radios. The radio’s standby frequency can be changed at anytime.
In DMR mode, PDC550 can send short messages to a group or an individual with narrowband network. The operation interface is similar to a mobile phone’s short message interface. Shortcut of sending predefined short messages is also supported. It is convenient to communicate with others even without public network.
DMR outdoor test 1: test on coverage in residential area
We selected a residential compound in Nanjing, China. Buildings in this compound are orderly distributed, and the total area is 0.6 km × 0.6 km. All the buildings have three floors. We carried out connection tests at each of the four gates (north, east, south, and west, with the north gate as the fixed point). With low TX power, the PDC550’s audio quality was 59. That is to say, in DMR mode, PDC550 can completely keep effective communications in this residential compound.
DMR outdoor test 2: test on working distance
We selected WenJing West Road (in Nanjing, China) for a test on the working distance of the radio from west to east. This road has heavy traffic, and most buildings alongside have three to six floors. PDC550 was tested that its normal communication distance between two radio is about 1.9km with low TX power and about 3.3km with high TX power. In a word, concerning the communication ability, Hytera PDC550 in DMR mode is comparable to professional two-way radios.III. Professional Digital Trunking Capabilities on Public Networks
PDC550 has the Hytera’s software installed to support the public network trunking mode. Users can set priority of the DMR or PoC (Push-to-talk over cellular) functions on the radio conveniently.
In PoC mode, PDC550 supports half-duplex individual calls, full-duplex individual calls, audio group calls, video individual calls, multi-party video calls, broadcast calls, and temporary group calls, etc.
Over the LTE network, PDC550 supports multimedia messaging and can send texts, images, videos, recordings, location information, files, and SOS messages to a group or an individual. The UI design is similar to that of WhatsApp. Users can easily get familiar with it.
With Hytera’s professional dispatch platform, PDC550 can implement professional dispatch functions, such as audio dispatching, image and video uploading, and location tracking to meet various dispatch requirements.
IV. Data Services on Public Networks
With abundant hardware configurations (such as the NFC, HD camera, positioning, and Bluetooth) and 4G networks, PDC550 can integrate with diversified apps to provide dedicated solutions, for example, QR code scanning, face recognition, license recognition, NFC card swiping and sign-up, and visual positioning. PDC550 is not only a radio but also a smart portable working terminal for users in different industries.
V. Summary
Hytera PDC550 is designed for high-end industry users to meet their requirements in different application scenarios, such as law enforcement, train, smart park, electric power, and water conservancy.
Core features of PDC550 are scored as follows:
· Push-to-talk function: 5 points
PDC550 enables comprehensive functions of Push-to-Talk Over Cellular and contains main professional features with broadband network. With the dispatching platform, it can meet users’ requirements in different professional scenarios.
· Audio in narrowband mode: 5 points
In narrowband mode, the audio is clear and loud. When two radios are getting close, there is no squealing sound.
· Signal in narrowband mode: 4.5 points
The test on working distance shows the signal of PDC550 is comparable to professional two-way radios.
· Industrial-grade design: 5 points
Details such as the belt clip, colored ring, and knob are subtly show Hytera’s deep understanding of customers’ demands in narrowband network.
· Battery backup time: 4.5 points
The 2400 mAh battery enables PDC550 to work for 45.5 hours in DMR mode (without starting the PoC software), which applies to most scenarios.
· Industry expansion: 4.5 points
Configured with diversified apps, Hytera PDC550 can easily address the special needs with its abundant hardware configuration and LTE broadband capabilities.
When there is no sound or low sound during the use of the walkie talkie, the first step is to check whether the battery voltage is sufficient. If the battery is normal, please check whether the receiving and transmitting frequencies and sub tone settings of the receiver and other walkie talkies are consistent. Under normal circumstances, please check in the following order:
Check the external socket of the horn and replace it if there are any problems.
Check the quality of the horn and replace it if there are any issues.
Check the encoder and potentiometer, and if there are any problems, please replace them.
Check the contact between the soft circuit plug and the motherboard socket. If there are any problems, please reinstall or replace the plug and socket.
Check the contact between the antenna and the antenna base. If there are any issues, please replace the antenna or antenna base.
Walkie Talkie launch issue
The problem with the transmitter of the walkie talkie is generally caused by the following reasons:
The battery is out of charge or the battery voltage is insufficient. Solution: Replace the battery or charge the battery.
The launch key (PT T key) is faulty. Solution: Replace the launch key.
Poor contact of the external microphone socket shrapnel caused internal blockage. Solution: Adjust the shrapnel or replace the microphone socket.
Poor contact between the soft circuit plug and the motherboard socket. Solution: Please reinstall or replace the plug and socket.
The microphone (transmitter) is faulty. Solution: Replace the microphone.
Walkie Talkie does not turn on (crashes)
Install the battery, turn on the power, and the walkie talkie will not turn on. After confirming that the battery is charged and the battery contacts are in normal contact. Firstly, it is necessary to check whether the safety tube has burned out due to the instantaneous excessive current. If the fuse is normal, the fault is usually caused by poor contact between the soft circuit plug and the motherboard socket. Simply replace the soft circuit plug or motherboard socket.
Walkie talkie beeps when turned on
The walkie talkie has advanced fault self checking function, and when there is a beep sound during startup, it is often due to the following faults discovered during the walkie talkie’s startup self check:
Frequency error, writing frequency outside the frequency range of the walkie talkie itself. Solution: Rewrite frequently.
Poor contact of the soft circuit. Solution: Replace the soft circuit plug or motherboard socket.
VCO loss of lock and related device failure. Solution: Replace 12.8M crystal oscillator or related components such as TC1 and TC2.